I put this guide together a few months ago from some people that had never built a Ghost server before. We used Windows 2008 Server and Symantec Ghost Solution Suite 2.5. The guide is written to a pretty basic level but it works. I have had 3 people built Ghost servers using this guide. I posted this because I have not found a great deal of information on building this server.
This build used 3Com services, they are a little on the old side but they are included on the Ghost install disk. Also there may be other ways this is just how I do it. Hope this helps someone.
—–This guide assumes you have a Windows Server with DHCP installed ———-
Installing Symantec Ghost Solution Suite 1.x or 2.x
– Basic install defaults work for most situations.
Install 3com Services
– Defaults work for everything except you should select server when the install comes to the following screen.

Selecting Server installs every part of the 3Com services.
Add Option 60 to DHCP Server
– This is not a default option and has to be added manually.
- Open command prompt as Administrator
- Enter netsh.exe dhcp server add optiondef 60 “Class ID” string 0 PXEClient
- Enter netsh.exe dhcp server set optionvalue 60 string PXEClient
- Exit the command window and restart the DHCP service
Creating Boot Image
- Open Symantec Ghost Boot Wizard

2. Select PC-DOS

3. Select TCP/IP Network Boot Image

4. Select Universal Packet Driver v2.0
– Additional drivers can be added here, and you can see all the current drivers by selecting the show all drivers check box.
5. Click next until you come to the following screen.

6. Browse for the location and enter the name you want for the file.
7. Click Next and then Finish.
Creating PXE Menus Boot file
- Open 3Com Boot Image Editor

2. Select Create PXE menu boot file

3. Select Add

4. Click Browse and select the boot image file and click ok
5. Click save and name the file
Create Bootptab file
- Open 3Com Bootptab Editor
- Select new

3. Select add

4. Enter Name, fill Node box with question marks, and select PXE Menu file you created. Click OK when finished.
5. Save file as Bootptab
If your network is configured you should be able to ghost images across the network. Changes can be made and there is still the possibility of errors. Such as the PXE-E79, NBP is too big error. This can be fixed by playing with the Bootptab file. This guide will get you setup but may require a few tweaks to fix any errors that may show up.
If you choose to boot in to a PE image you can do that with these simple steps. The previous instructions are for a PCDOS PXEboot. To do this you get rid of option 60 and add options 66 and 67. Option 66 is the boot servers name or IP address and 67 is the boot file name and location. You do everything the same except you build a PE image instead of a PCDOS images.

Then add the two options to your DHCP server options.
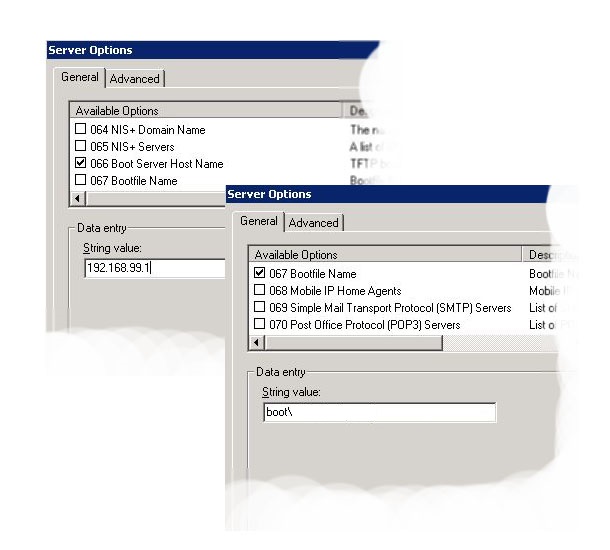
Once again in 66 you add your boot server IP and in 67 you add the path to the boot file location. You will leave off the TFTPBOOT folder part of the path. Because it will look there by default. The file you put in there sill be PXEboot.n12 if it was made with the Ghost image builder. Then it will boot into a screen that looks like the following.
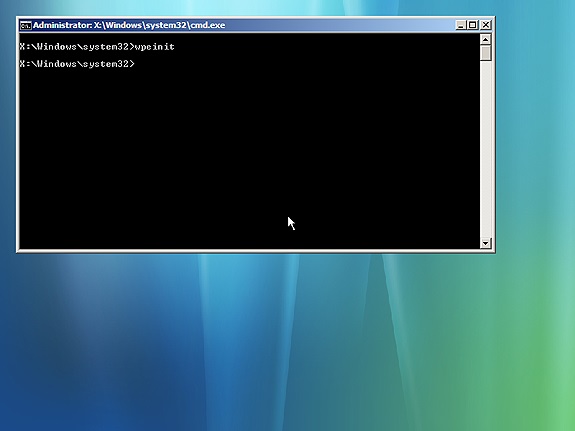
The Ghost menu will pop up and you will be ready to go. You can also use a Linux boot image with this style of PXEboot by adding your Linux image into the TFTPBoot folder and adding that path into option 67. The file it boots will usually be pxelinux.0 or something similar.
I have had problems using this way for ghosting certain machines because the PE environment didn’t have the correct drivers for the hardware. So I usually use PCDOS. I just thought I would add this in there for people that want to try something different.
6 Comments To "Guide to Building Symantec Ghost Cast Server"
#1 Comment By Tim On November 1, 2011 @ 07:06
Enabling option 60 on DHCP may stop your clients receiving an address entirely – see http://support.microsoft.com/kb/259670
#2 Comment By ogwatermelon On November 1, 2011 @ 08:44
Yes that is what the article says. However I will say that I have used this build procedure for 6 years. On Windows Server 2003, 2003 R2, 2008 R1 and 2008 R2. It worked every time. I also travel around setting up remote sites using these Ghost servers. So the method it tried and true but you may encounter this error. There maybe other configurations. If you know them feel free to share.
#3 Comment By akis On March 30, 2012 @ 01:14
Hello,
i have some questions regarding the Symantec Ghost Cast Server
1-can you please provide any other way to set up 80 computers without the Symantec Ghost Cast server multicast mode?
2-how long its takes to set up through LAN an image of 20GB (Win 7 in minutes) using Symantec Ghost Cast server?
thank you
#4 Comment By ogwatermelon On March 30, 2012 @ 07:49
First lets start with the time it takes to send out an image. We imaged about 300 computers a few weeks ago and an image that was 23 gig took 45 minutes on a 1 GigaBit LAN. We were also sending it out to about 100 computers.
As for the multicasting, we use multicasting when ghosting more than a few computers. the other ways are Unicasting or a Directed Broadcast. Unicast is only good for a few computers, so you will have to do a Directed Broadcast. I have never used this mode before so I can’t say what will change in the time it takes to send out the image. If I am not mistaken it is an option when you log into the ghost session to select this mode. However depending on the version you have it may be a little different. Good luck.
#5 Comment By frommars6 On January 26, 2017 @ 15:36
Omg, I came across your article online. Is there any other way w.o having to set up ghostcast to image multiple pc’s with ghost?
#6 Comment By ogwatermelon On January 26, 2017 @ 22:59
Ghost Cast is the way to do multiple machines at the same time using Ghost. The Ghost application itself will only do one computer or drive that is physically attached. It will only do one drive at a time as well.