I was looking for a good alternative to ESXi hypervisor. I also wanted to have some high end features that I paid for with my VMWare setup. I also wanted to use some mini PCs to save on space and maybe even a little electricity. I had played with ProxmoxVE 2.0 a while back and I read an article in Linux Journal that featured ProxmoxVE so I thought I would look in to using it. After a bunch of reading and video watching I decided to give it a shot. I will be using this for web hosting and a few servers that I use inside my own network. I currently run 14 VMs and will be down sizing to what I really need.
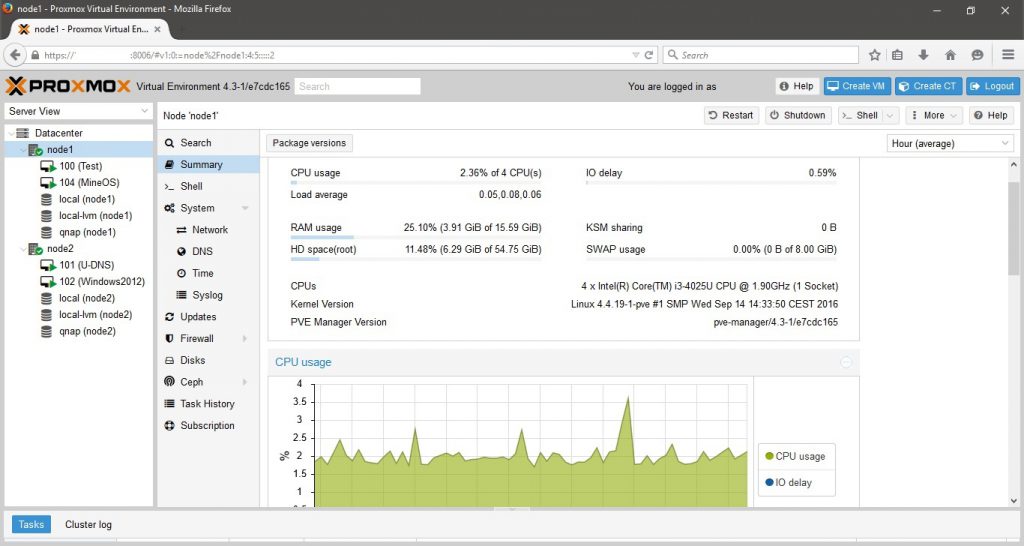
ProxmoxVE uses KVM and container based virtualization. It has an easy to use web interface that is loaded with features. It has automated backups, High Availability, Live Migration, built in monitoring, with the ability to support almost any hardware. So lets start with my hardware. I used two HP 30-300 mini PCs and a QNAP 231+ NAS. Below are the PC specs:
HP 30-300 Mini PC
- Processor: Intel Core i3-4025U
- Memory: 16Gig DDR3-1600
- NICs: Realtek RTL8151 and J5 JUE130 USB 3.0
- Hard Drive: AxionII 256G SSD
- 4 USB 3.0 ports
So you may be asking why I used USB NICs, but I have used the JUE130 NIC on a Mini PC I turned into a firewall for over a year with no problems. USB 3 runs at 5 Gbps so it can handle the speed of a Gig NIC.
I downloaded the Proxmox VE 4.3 and installed it on the two PCs. First thing I will say is have the names planned before install. Once you install changing the name is not worth the amount of work and doing caused my web interface to stop working. So I just reinstalled and had no problems. It is recommended that you install a min of 3 machines to create a cluster but I only have the two so that is what I am going with. I used an NFS share on the QNAP NAS for the shared storage but you can use DRBD to create shared storage if you choose not to use a NAS. I wanted to have a fully separate storage in case I lost a drive. My NAS is a RAID 1 as well.
Creating a cluster is pretty simple. If you don’t have a DNS server on your network you will want to add the nodes into each others hosts file. To create a cluster simple run the following commands once the nodes are on the network.
- On the primary node or first node you choose.
- pvecm create cluster name
- On the second node
- pvecm add IP of first node
- To check status of cluster
- pvecm status
I ended up rebuilding my cluster a few time due to Quorum problems. Quorum is how the cluster lets each node know it is still there. It would work for a few minutes and then one of the nodes would drop off. So I ended up adding a cron job that would change a setting on boot and didn’t have another problem. It is a multicast snooping setting, and there is no guarantee you will have this. My cluster has been running for 2 weeks now without losing quorum. It would also reset this value upon reboot so I made the cron to take care of this. The cron syntax is below.
@reboot echo 0 >/sys/class/net/vmbrx/bridge/multicast_snooping
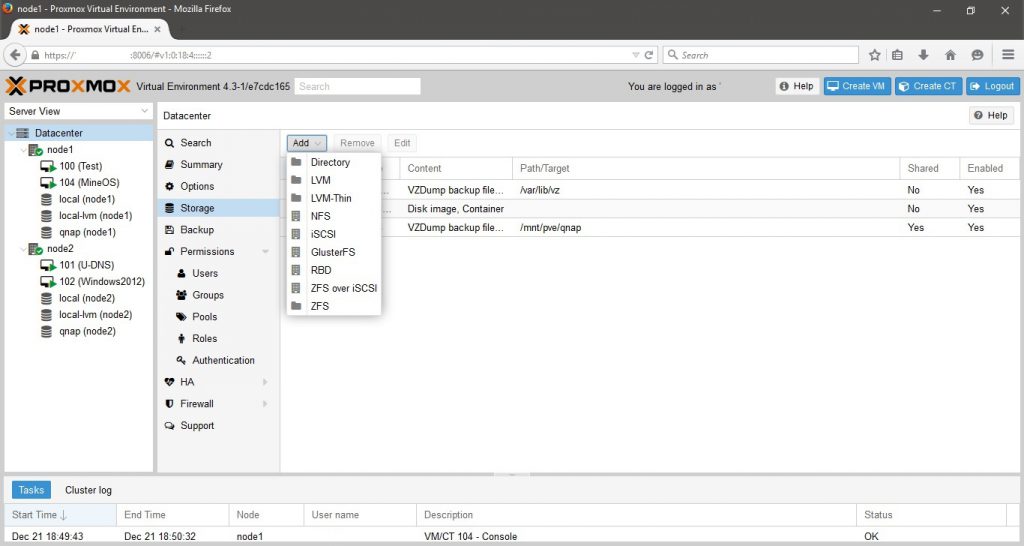
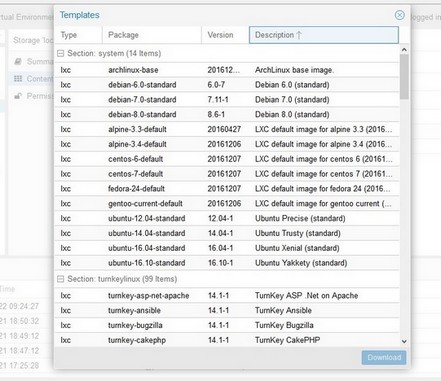
I then create an NFS share on my QNAP and added it in the data center tab of the web interface. It installs on both nodes and you are ready to create VMs. I didn’t use any container VMs, just KVM based ones. As a side note I could only get live migration to work with the qemu disk type. I already have a bunch of pre made vmdk images, but it required a shutdown to migrate them. There is a ton of settings to build the VMs with. The only thing I saw that was important for shared network storage was to set the VM to have no caching. I built 4 VMs to test the system. I build a Windows 2012 server, a MineOS (Minecraft server), a Ubuntu 16.0.4 (Mumble server), and a Ubuntu 16.0.4 (DNS server). I built all of these with the qemu format except the Mumble server and that is how I found the migration problem. It is also possible that I did something wrong and that is why it will not live migrate. Any how I built the Minecraft server to really test load and migration. So I got it built and had a few people login and play while I migrated it to the other node. It worked great and we didn’t even see any lag. Also there is over 100 different templates that can be downloaded to build VMs on you nodes. This may save you some time building out your VMs.
Below is also a good list of CLI commands that can be used to check status or to write scripts to do your bidding.
- Proxmox commands
- pveversion -v to check version of packages, can be done in the web GUI as well
- pveupdate update package db
- pveupgrade upgrade ProxmoxVE install
- pvesh open interactive custom shell
- pveperf to check Proxmox node performance
- pvecm cluster management with a lot of switches
- pvesm to deal with Proxmox storage
- KVM VMs Command
- qm to work with VMs directly, has a lot of switches
- Container VM Command
- pvectl to work with VMs directly, has a lot of switches
- vzctl to work with VMs directly, has a lot of switches
As I have been writing this a new version has come out with some web GUI changes. So I am going to write another post that goes over some other features and will include the upgrade process. But I will say I am happy with this product. It is free and has a lot of potential with tons of high end features. So feel free to ask questions and I will try to help.