Private AI with Ollama and Open WebUI
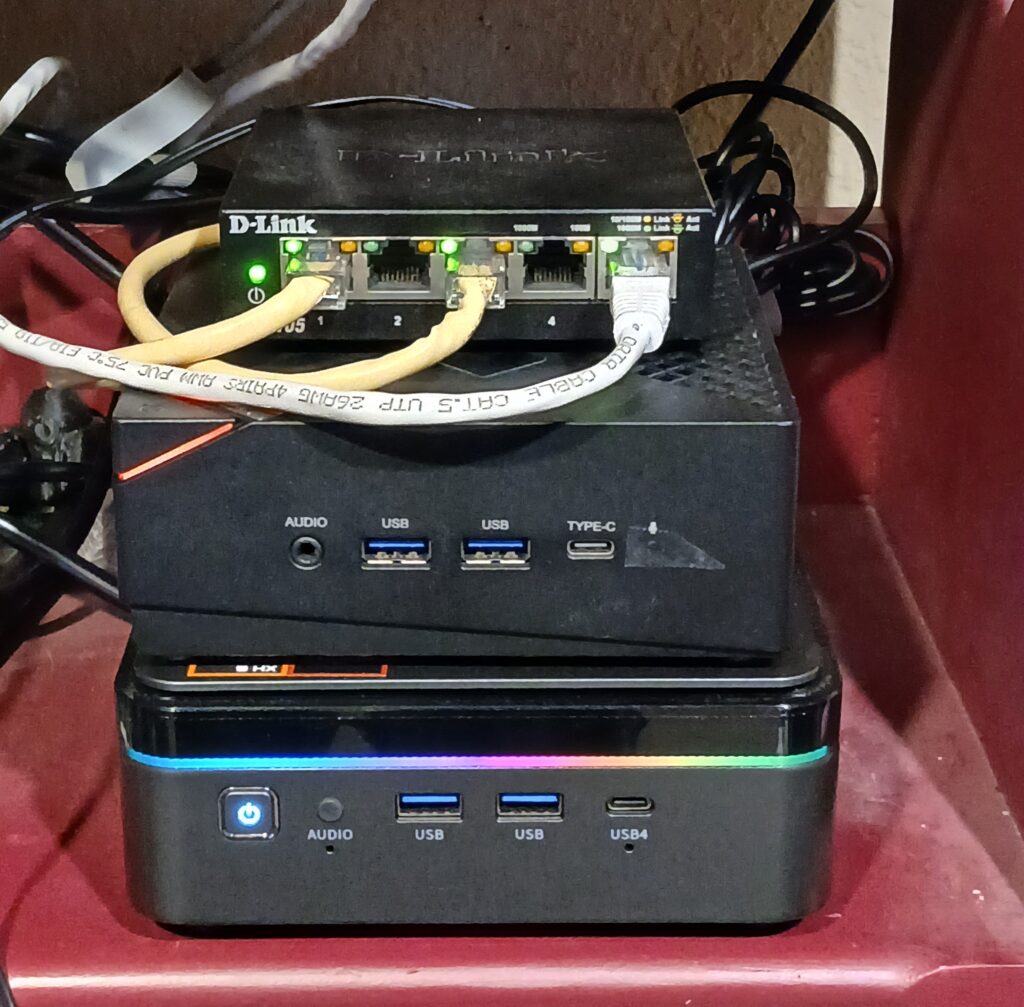
So, it has been a while since I posted but I have several projects that I will document here in the near future. To get started I will talk about my primary LLM system that I use for various things. This uses two mini-PCs and a 5 port gig switch. The web interface is Open WebUI and the LLM software is Ollama. Let’s start with the hardware specs.
Ollama system is an Acemagic F3A Ryzen AI 9 HX 370.
Processor
CPU AMD Ryzen™ AI 9 HX 370
CPU AMD Radeon™ 890M
Memory & Storage
Memory 94GB: Dual 48GB DDR5 5600MHz Dual Channel
Storage 1TB M.2 2280 NVMe SSD
Open WebUI system is a GMKtec Ryzen 5
Processor
CPU AMD Ryzen™ 5 7430U
GPU AMD Radeon™ 680M
Memory & Storage
Memory 32GB: Dual 16GB DDR4 4800MHz Dual Channel
Storage 1TB M.2 2280 NVMe SSD
These systems are tied together by a simple Linksys 5 port gigabit switch. The base operating system is Ubuntu server 24.01 with no GUI.
The goal is to allow the operating systems to use as little resources leaving them for the LLM and web interface. The reason I separated Open WebUI from the Ollama system is so I could have large vector databases that I can use to improve the accuracy of the system answers along with web searches without eating up resource for Ollama. I will start with the primary AI server.
The LLM system uses Ollama as the software running on the AI server. Let’s talk a little about Ollama. Ollama stands for (Omni-Layer Learning Language Acquisition Model), it is an open-source platform designed to run large language models locally. It allows users to generate text, assist with coding, and create content privately and securely on their own devices. It allows users to maintain full control over their data, enhancing privacy and security by avoiding cloud storage. Installing Ollama is straightforward, even if you’re only familiar with the occasional command‑line tool.
Linux users have a couple of options: the quick‑start script (curl -fsSL https://ollama.com/install.sh | sh) will auto‑detect your distro and install the binary into /usr/local/bin, or you can grab the Debian/RPM packages directly from the “Downloads” page and install them with sudo dpkg -i. Once the binary is in place, verify the installation by opening a terminal and typing ollama –version; you should see the current version number and a friendly confirmation that the runtime is ready to go.
The web interface system uses Open WebUI that is more than just a GUI. Open WebUI is an extensible, feature-rich, and user-friendly self-hosted AI platform designed to operate entirely offline. It supports various LLM hosts like Ollama and OpenAI-compatible APIs, with built-in inference engine for RAG, making it a powerful AI deployment solution. You can read more about it at the following link: HERE.
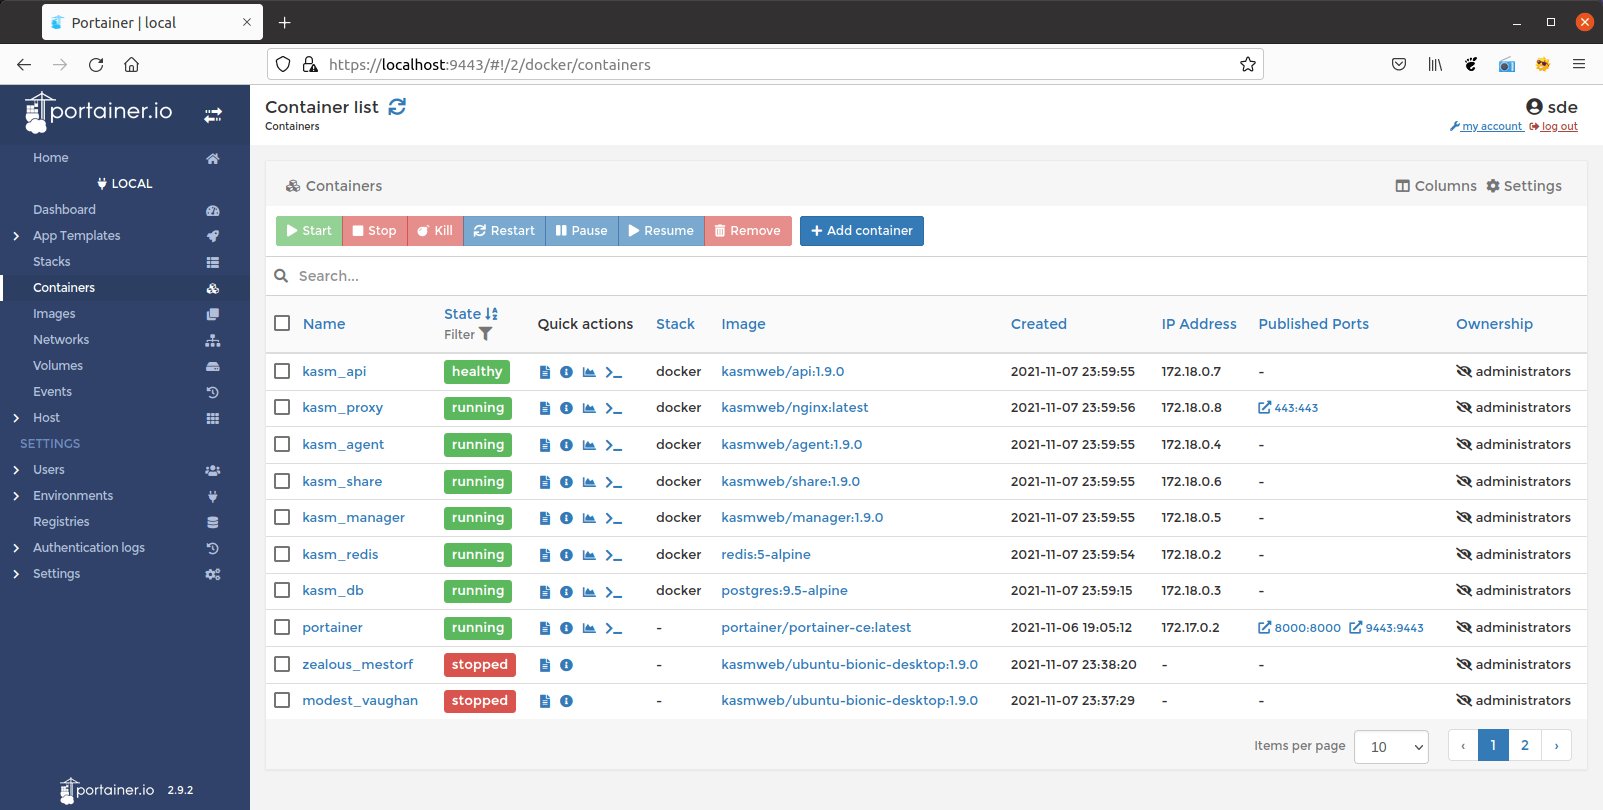
My setup uses Docker to contain Open WebUI. This allows for easy updating with minimal effort. You can install Docker using the APT package manager or you can add the Docker repos and use the Docker hosted packages. The installation is covered at their site: Click here. Inside Docker I run two containers, one is the Open WebUI container and the other is Portainer CE. Portainer is a web GUI that can be used to manage the container, image, and volumes on the Docker host. Installing Portainer is cover at their website at the following link: Click here. Below is an example of the Portainer GUI.
Now on to Open WebUI. Most of the big AI interfaces are very similar making this easy to use. To read more about getting start go to the following link. This will take you to their quick start page. I used the command below to create the volume to store the data, change the access port to 8080, and to set the URL that will be used to access Ollama. That is an important piece. If you don’t set the Ollama url you will have problems and Open WebUI will not know where to send queries to the LLM.
docker run -d -p 3000:8080 –network=host -v open-webui:/app/backend/data -e OLLAMA_BASE_URL=http://10.10.0.1:11434 –name open-webui –restart always ghcr.io/open-webui/open-webui:latest
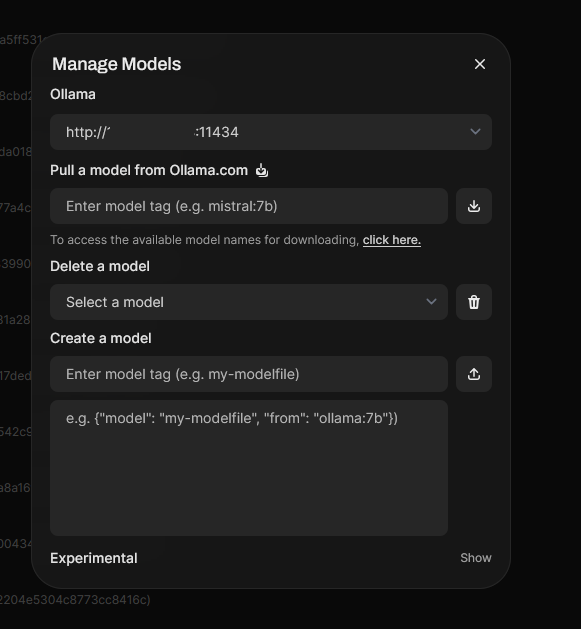
Now that everything is installed, it is time to get into the interface. Open WebUI has local authentication that is nice to help secure you instance and allow for different users with their own data. It will initially ask for you to create and account and this will be your admin account. Then you will need to go to the upper right corner and left click on the circle icon for your user. Then select Admin panel and go to connections. Here I turned off OpenAI API and put the Ollama url that was used when creating the Open WebUI docker container. Select save in the lower right and you should be in business. Now on the left of the screen select models. Then select the download icon in the upper right to open the model download window. Select click here and it will take you to the Ollama model website. Copy and paste the name into the pull model text box and select the download icon.
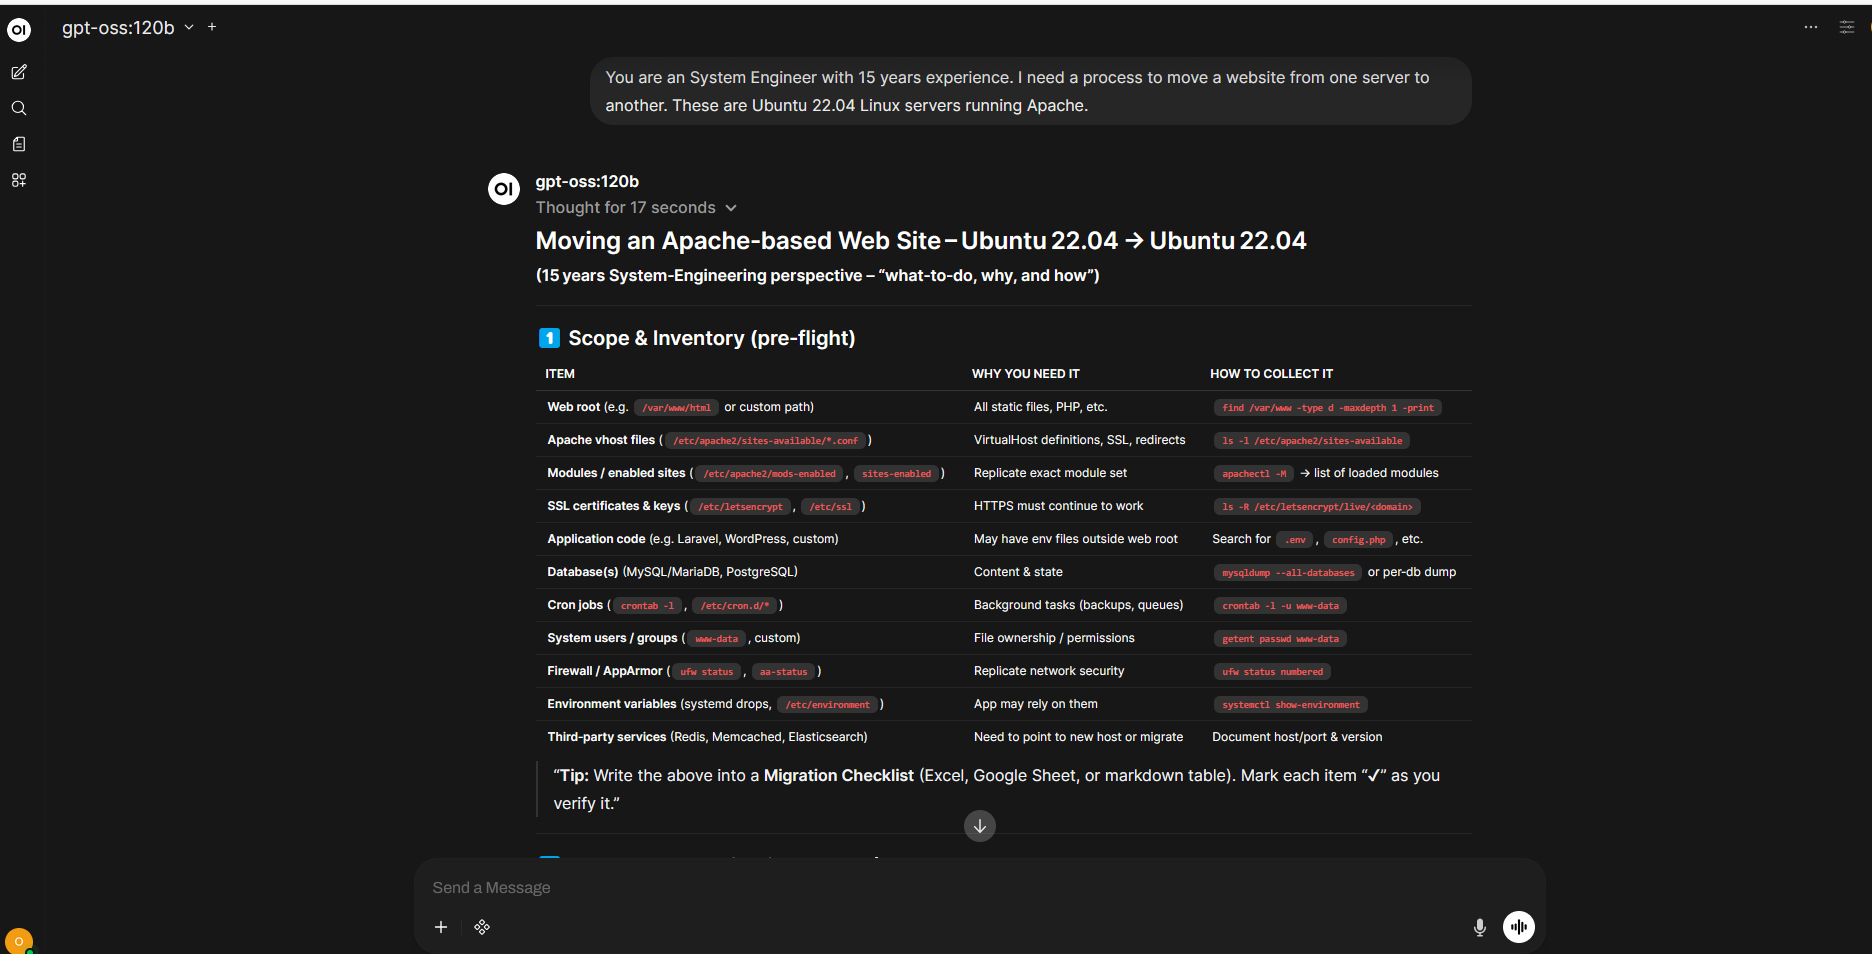
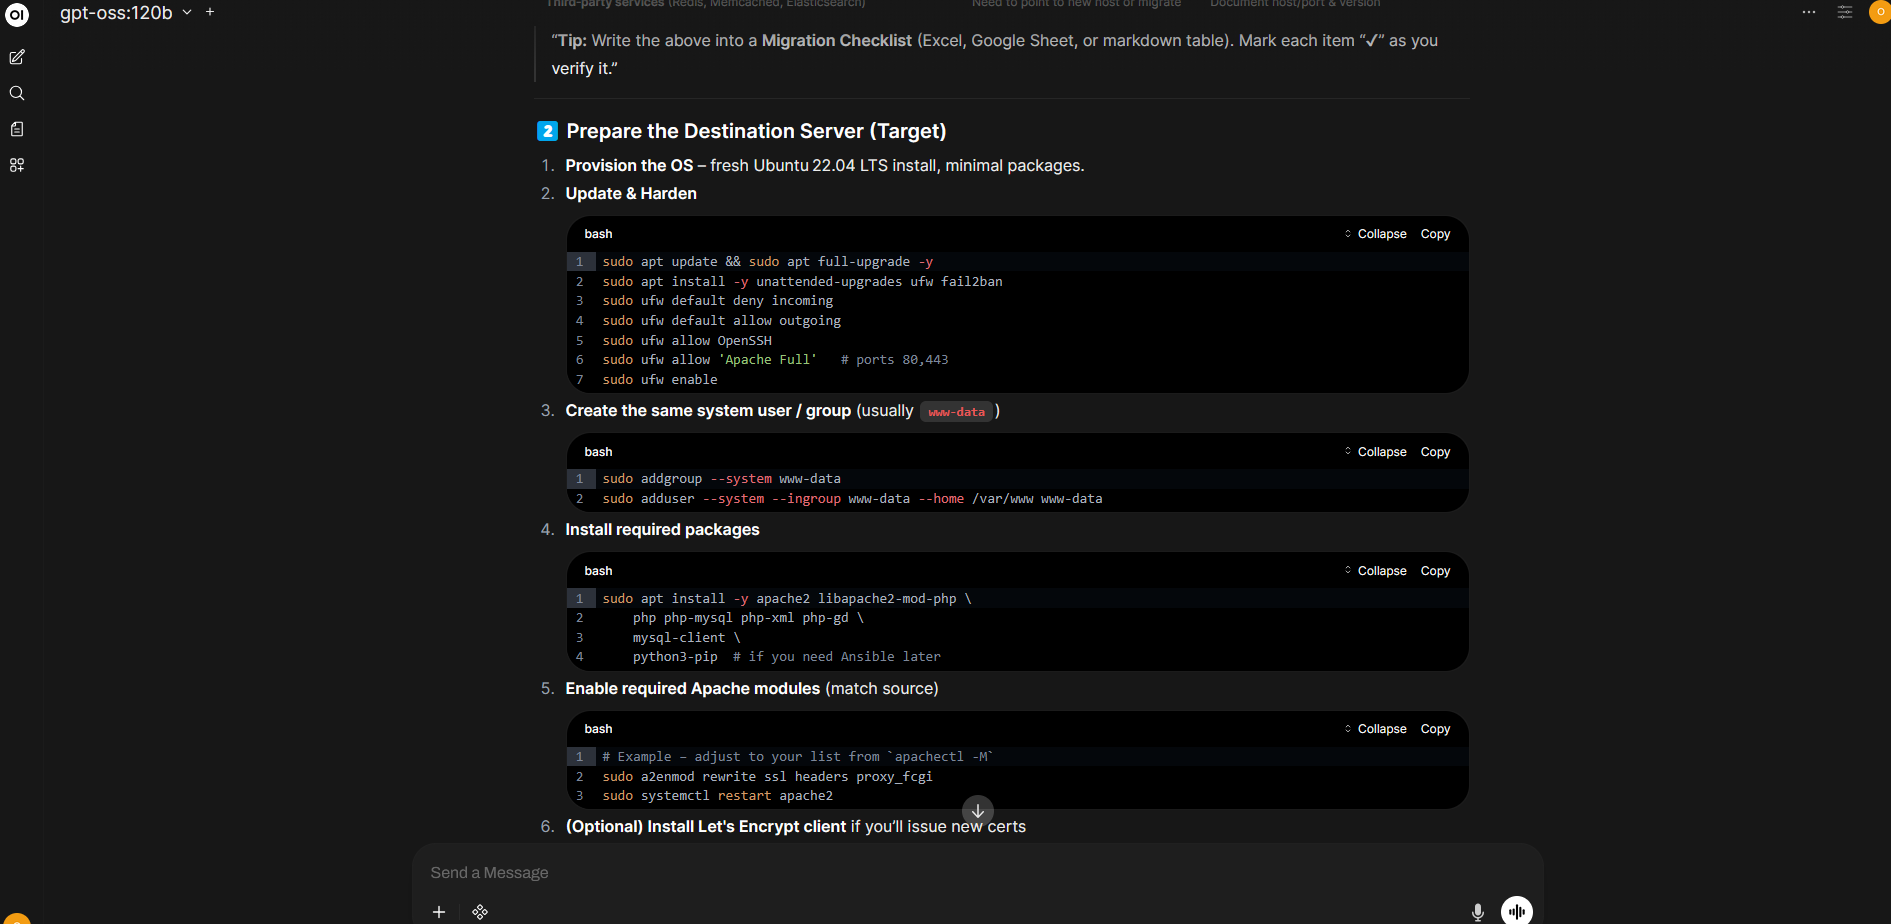
The model you select is really preference and what your system can handle. I have nineteen models downloaded to my Ollama instance. However, the primary one I use is the 120 billion parameter GPT-OSS model. This model is fast and works really well on my setup. It does use around 70 gigs of memory once loaded and makes my host usage go up without maxing it out. You can then pair it with a knowledge store and/or use web search to increase the accuracy and focus of the LLM’s response.
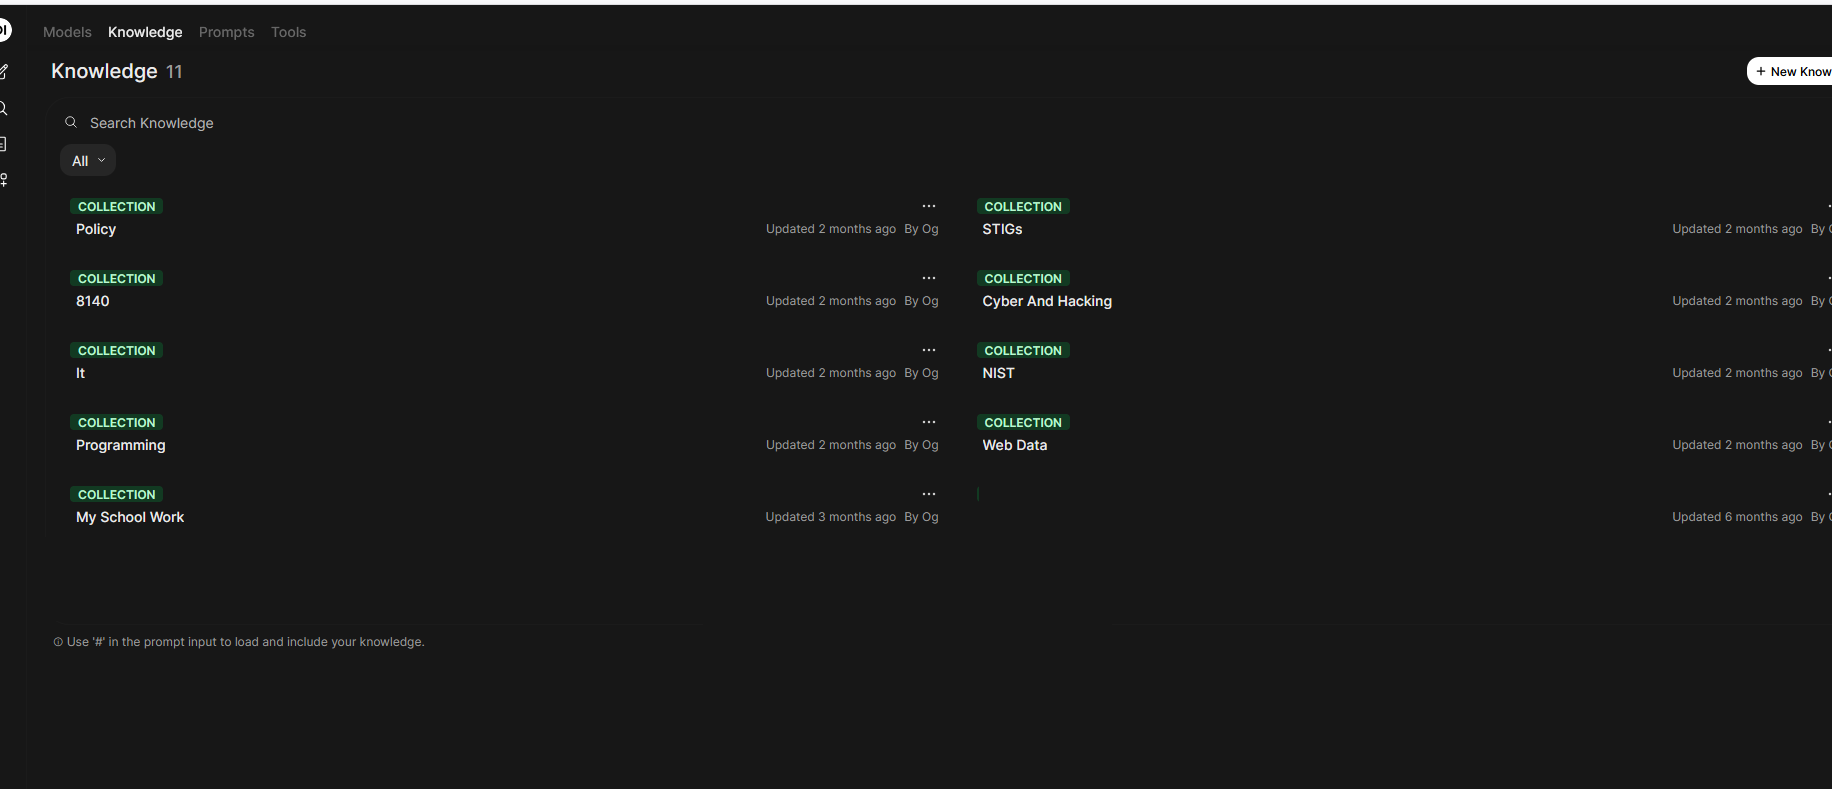
Creating the knowledge stores are easy and can be accessed by going to workspace. Then select knowledge and click the new knowledge store button. You can upload any kind of document such as pdf or text documents. The system will convert them to pure text for its use. I create knowledge stores for specific areas IT or programming. This allows for a more focused interaction and will lower the amount of data it will go through during a query. I currently have eleven different knowledge stores. Using web searches and knowledge stores will also slow the response down as it goes through the data for relevant info.
There are a lot of settings that you will need to learn and configure as needed. One I think is important is setting up the web search function. There are a great deal of option, but I simply use google but you need an API key to make it work. It is in the Admin Panel under settings and Web Search. This will allow for searching for more current data for your LLM queries.
This wraps everything up that I am going to cover for this post. Below is a few screen shots of a query to migrate a web server using the GPT-OSS:120b model. The actual response is long and I only added a few pics. I hope this helps anyone wanting to have a local LLM for privacy and to not have to pay a subscription to the large companies.