
Portainer.io Docker Swarm Pi Cluster
Well I got a Raspberry Pi 4 a while ago and decided I wanted do something with it. So I was playing around and just watched a video on Docker so I installed it and played around. The docker installation worked great and didn’t use vary much of the Pi resources so I thought it would be a great platform to build a cluster. So I wanted to replicate as close as possible the virtual machines I have already using a Raspberry Pi 4 cluster. Finally I wanted to see how long this will work without errors, how much power it would draw, and is it a feasible solution.
Below it the parts list that I used for this project:
- 4 Raspberry Pi 4s 2 Gigs of RAM
- 1 Raspberry Pi 3 B
- 4 32 Gig and 1 16 Gig Micro SD Cards
- Anker Power Port 6 Lite (USB charging device)
- 5 USB and Cat5e cables
- flip switch to turn the cluster on and off
Software:
- Linux Pi image
- SDFormater
- balenaEtcher
- Putty or some kind of SSH client
Now that I have all of the parts I started imaging the micro sd cards with the latest version of Ubuntu for R Pi 4 (19.10.1 arm64). This version would work on the R Pi 3 as well. I also didn’t want to have the cluster just laying on a table I wanted it to be self contained and neat. I have several 3D printers so I found a few cluster cases on Thingiverse that I liked and tried them out. The one I chose was MultiPi that could be expanded. You can see it here. However there was no provisioning for a R Pi 4 and I had to modify it to work. Once I did all the adjustments I printed 5 tiers and a top. This took about 10 hours so time was ticking by and I had not even started.
Once that was complete I put everything together and powered up the cluster. I used an IP scanner to find the IPs for the cluster nodes and used Putty to SSH into each one. You can use your DHCP server and find the IPs there as well. I logged in and went to my configuration. All of the nodes have to be in each nodes hosts file so some thought on names and IPs has to be done before hand or on the fly if that is the way you roll. I simply configured one system and then copied the data to notepad to past into the next. The config is pretty much the same as any Linux configuration but I had never used Netplan before. This is the program Ubuntu 19.10 uses to manage the network connections. Below is the steps and syntax for Ubuntu 19.10:
- change default username if want to
- cd /etc/netplan/
- vi or nano 50-cloud-init.yaml
- Inside the yaml file modify and add the following using your IP info.
       dhcp4: no
             addresses: [192.168.0.190/24]
             gateway4: 192.168.0.1
             nameservers:
               addresses: [8.8.8.8]
- netplan apply (will have to log back in)
sudo hostnamectl set-hostname(Your new hostname)- vi or nano /etc/hosts –add all nodes in cluster
        192.168.0.190  master
        192.168.0.191  node-1
        192.168.0.192  node-2
        192.168.0.193  node-3
        192.168.0.194  node-4
- sudo apt-get update
- sudo apt-get upgrade — to make sure your on the most current packages
Now that the basic config has been done you can begin working on Docker. You can use the versions that are in the apt repo but I ran into problems with them. I wanted to use a web interface to monitor the cluster so I didn’t have to login to every machine to check. So I chose Portainer.io as my GUI. The versions in apt don’t work correctly or I just had a lot of problems getting it to work. So I found a script that you can use but it kept throwing errors and I didn’t want to spend time to fix it. You can get the docker script here. It may work for you. I went to the Docker website and just added their repo. You do have to use the one for Ubuntu 19.04 (disco) because the 19.10 (eoan) is missing a file that will allow you to use https to get updates. Below is the syntax to add the repo and install Docker:
- apt-get install apt-transport-https ca-certificates curl gnupg-agent software-properties-common
- curl -fsSL https://download.docker.com/linux/ubuntu/gpg | sudo apt-key add –
- add-apt-repository “deb [arch=arm64] https://download.docker.com/linux/ubuntu disco stable”
- apt-get update
- apt-get install docker-ce docker-ce-cli containerd.io
Docker will now be installed and you will need to SSH into the cluster nodes to finish the configuration. Start with the Master and simply run docker swarm init. This will spit out a string. Copy this string and use it on all of the worker nodes. They will then join the Swarm cluster. You now have a fully functioning Docker Swarm Cluster. You can see if the nodes are connected by going to the master and typing: docker node ls. You should get output like the following:
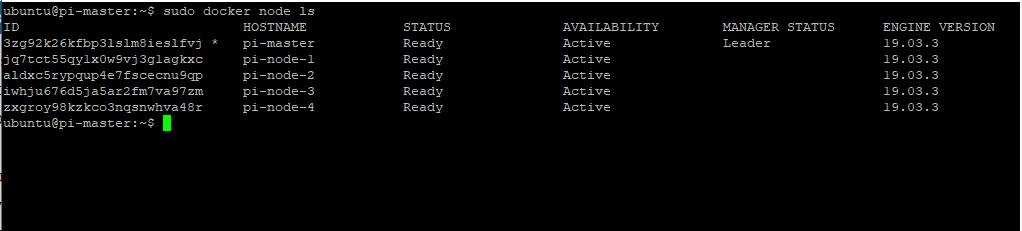
You can now install images and do replicas across the cluster. At this point is when I install Portainer for my web interface. If you just want to check it out you can click here. You can install this a few ways. It can be as a standalone container or as a cluster service. I have done both but the standalone with the packages found in apt coused my all kinds of problems and that is why I changed to the docker repo itself. Anyhow back to the install. Use the following syntax to deploy Portainer and the agents as a service using the cluster master:
- curl -L https://downloads.portainer.io/portainer-agent-stack.yml -o portainer-agent-stack.yml
- docker stack deploy –compose-file=portainer-agent-stack.yml portainer
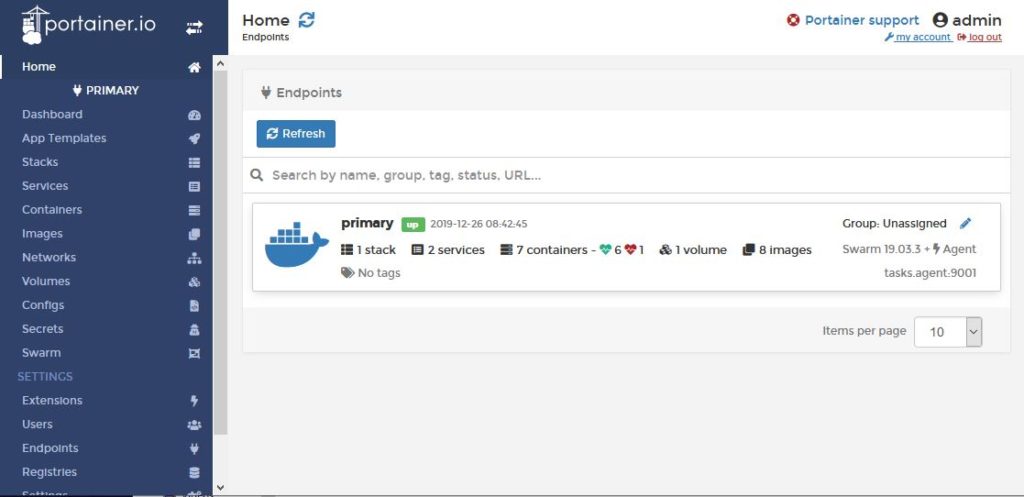
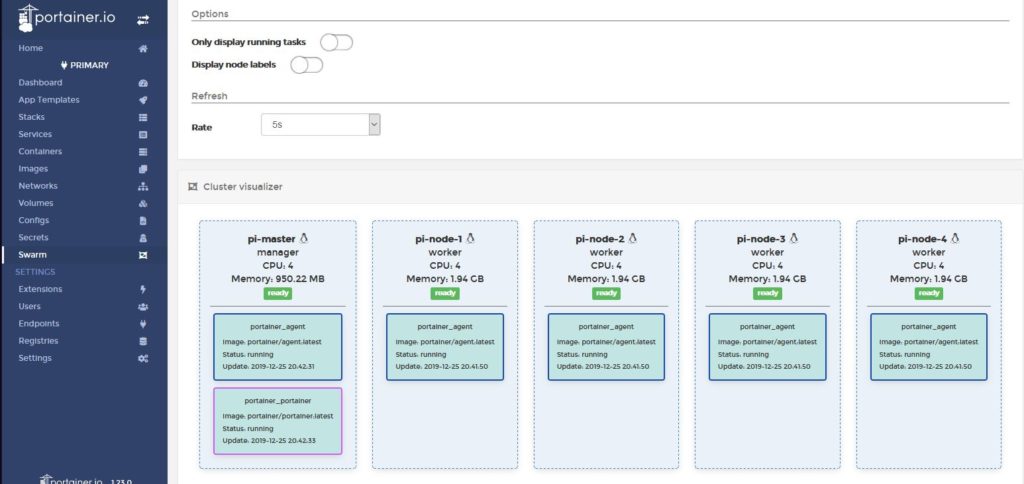
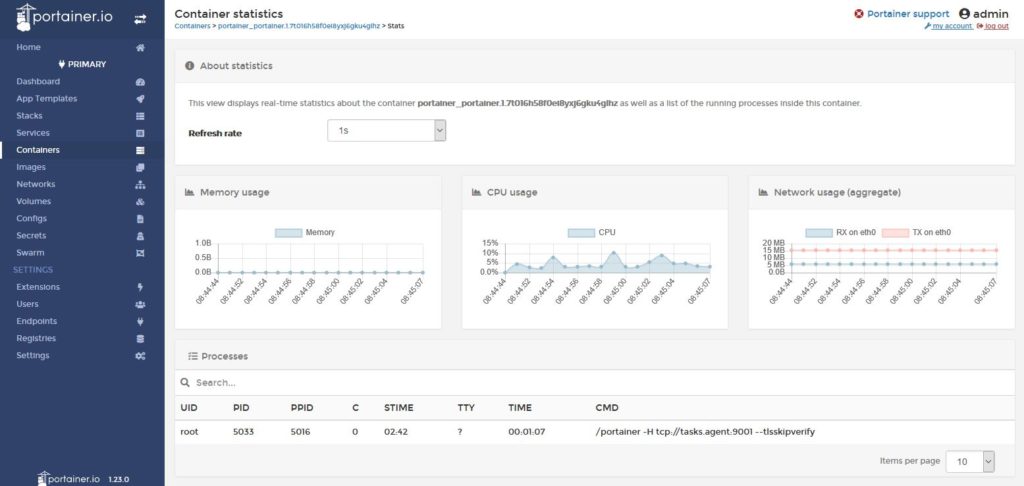
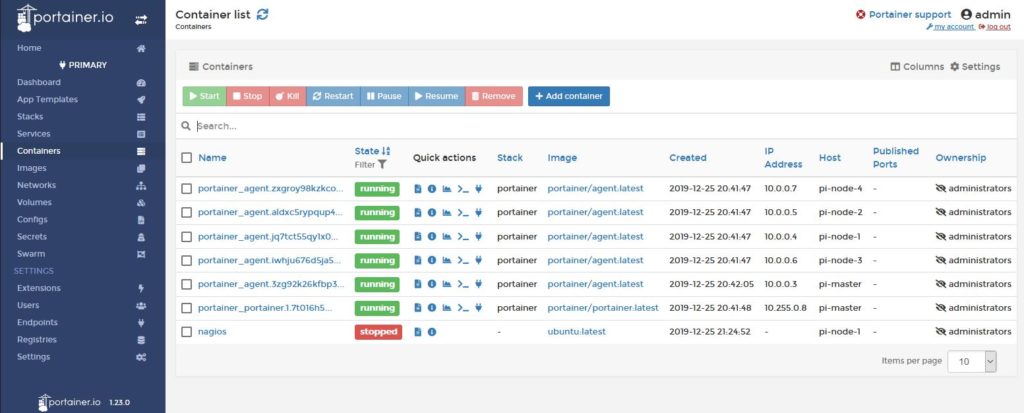
Login using your Swarm master IP with port 9000. This will bring up the initial login when you will set a password for the admin user. This web GUI has tons of configuration, status of systems and containers, and the ability to deploy more. You can get graphs of the container system usage and cluster status. Here are some pics of my install.
Now that I have a functioning cluster I am going to begin to build out the containers that I will be using. I have already found somethings that annoy me such as the ports have to be advertised to the host OS before the container is started. So if you have to change anything you have to restart the container with the ports defined. That may sound trivial but that is a pain to me. So I hope this helps someone build their own cluster and make them want to work with Docker. If you have any questions please leave a comment and I will help you as much as I can. I will write another post detailing my container builds and how it is holding up.